In early 2021 I built my very first instrument – a 3d-printed violin! This blog post starts with a seven-minute video outlining the creation process. The video also features a professional violinist who tested the printed instrument. Additionally, in text form, the blog post is sharing what a luthier says about the violin, as well as more technical details, which accompany the video. Lastly, you can find links to the 3d-model files.
Information about the video:
The violin blueprints are from this page. In the following, there will be terminology used which refers to components of violins. For example words like fingerboard, nape, and scroll. If you want to look them up, the blueprints at the link can come in handy.
In the video Mischa Tangian plays Mozart’s piece Sehnsucht nach dem Frühling (at 4:35). He is a professional violinist with the Babylon Orchestra.
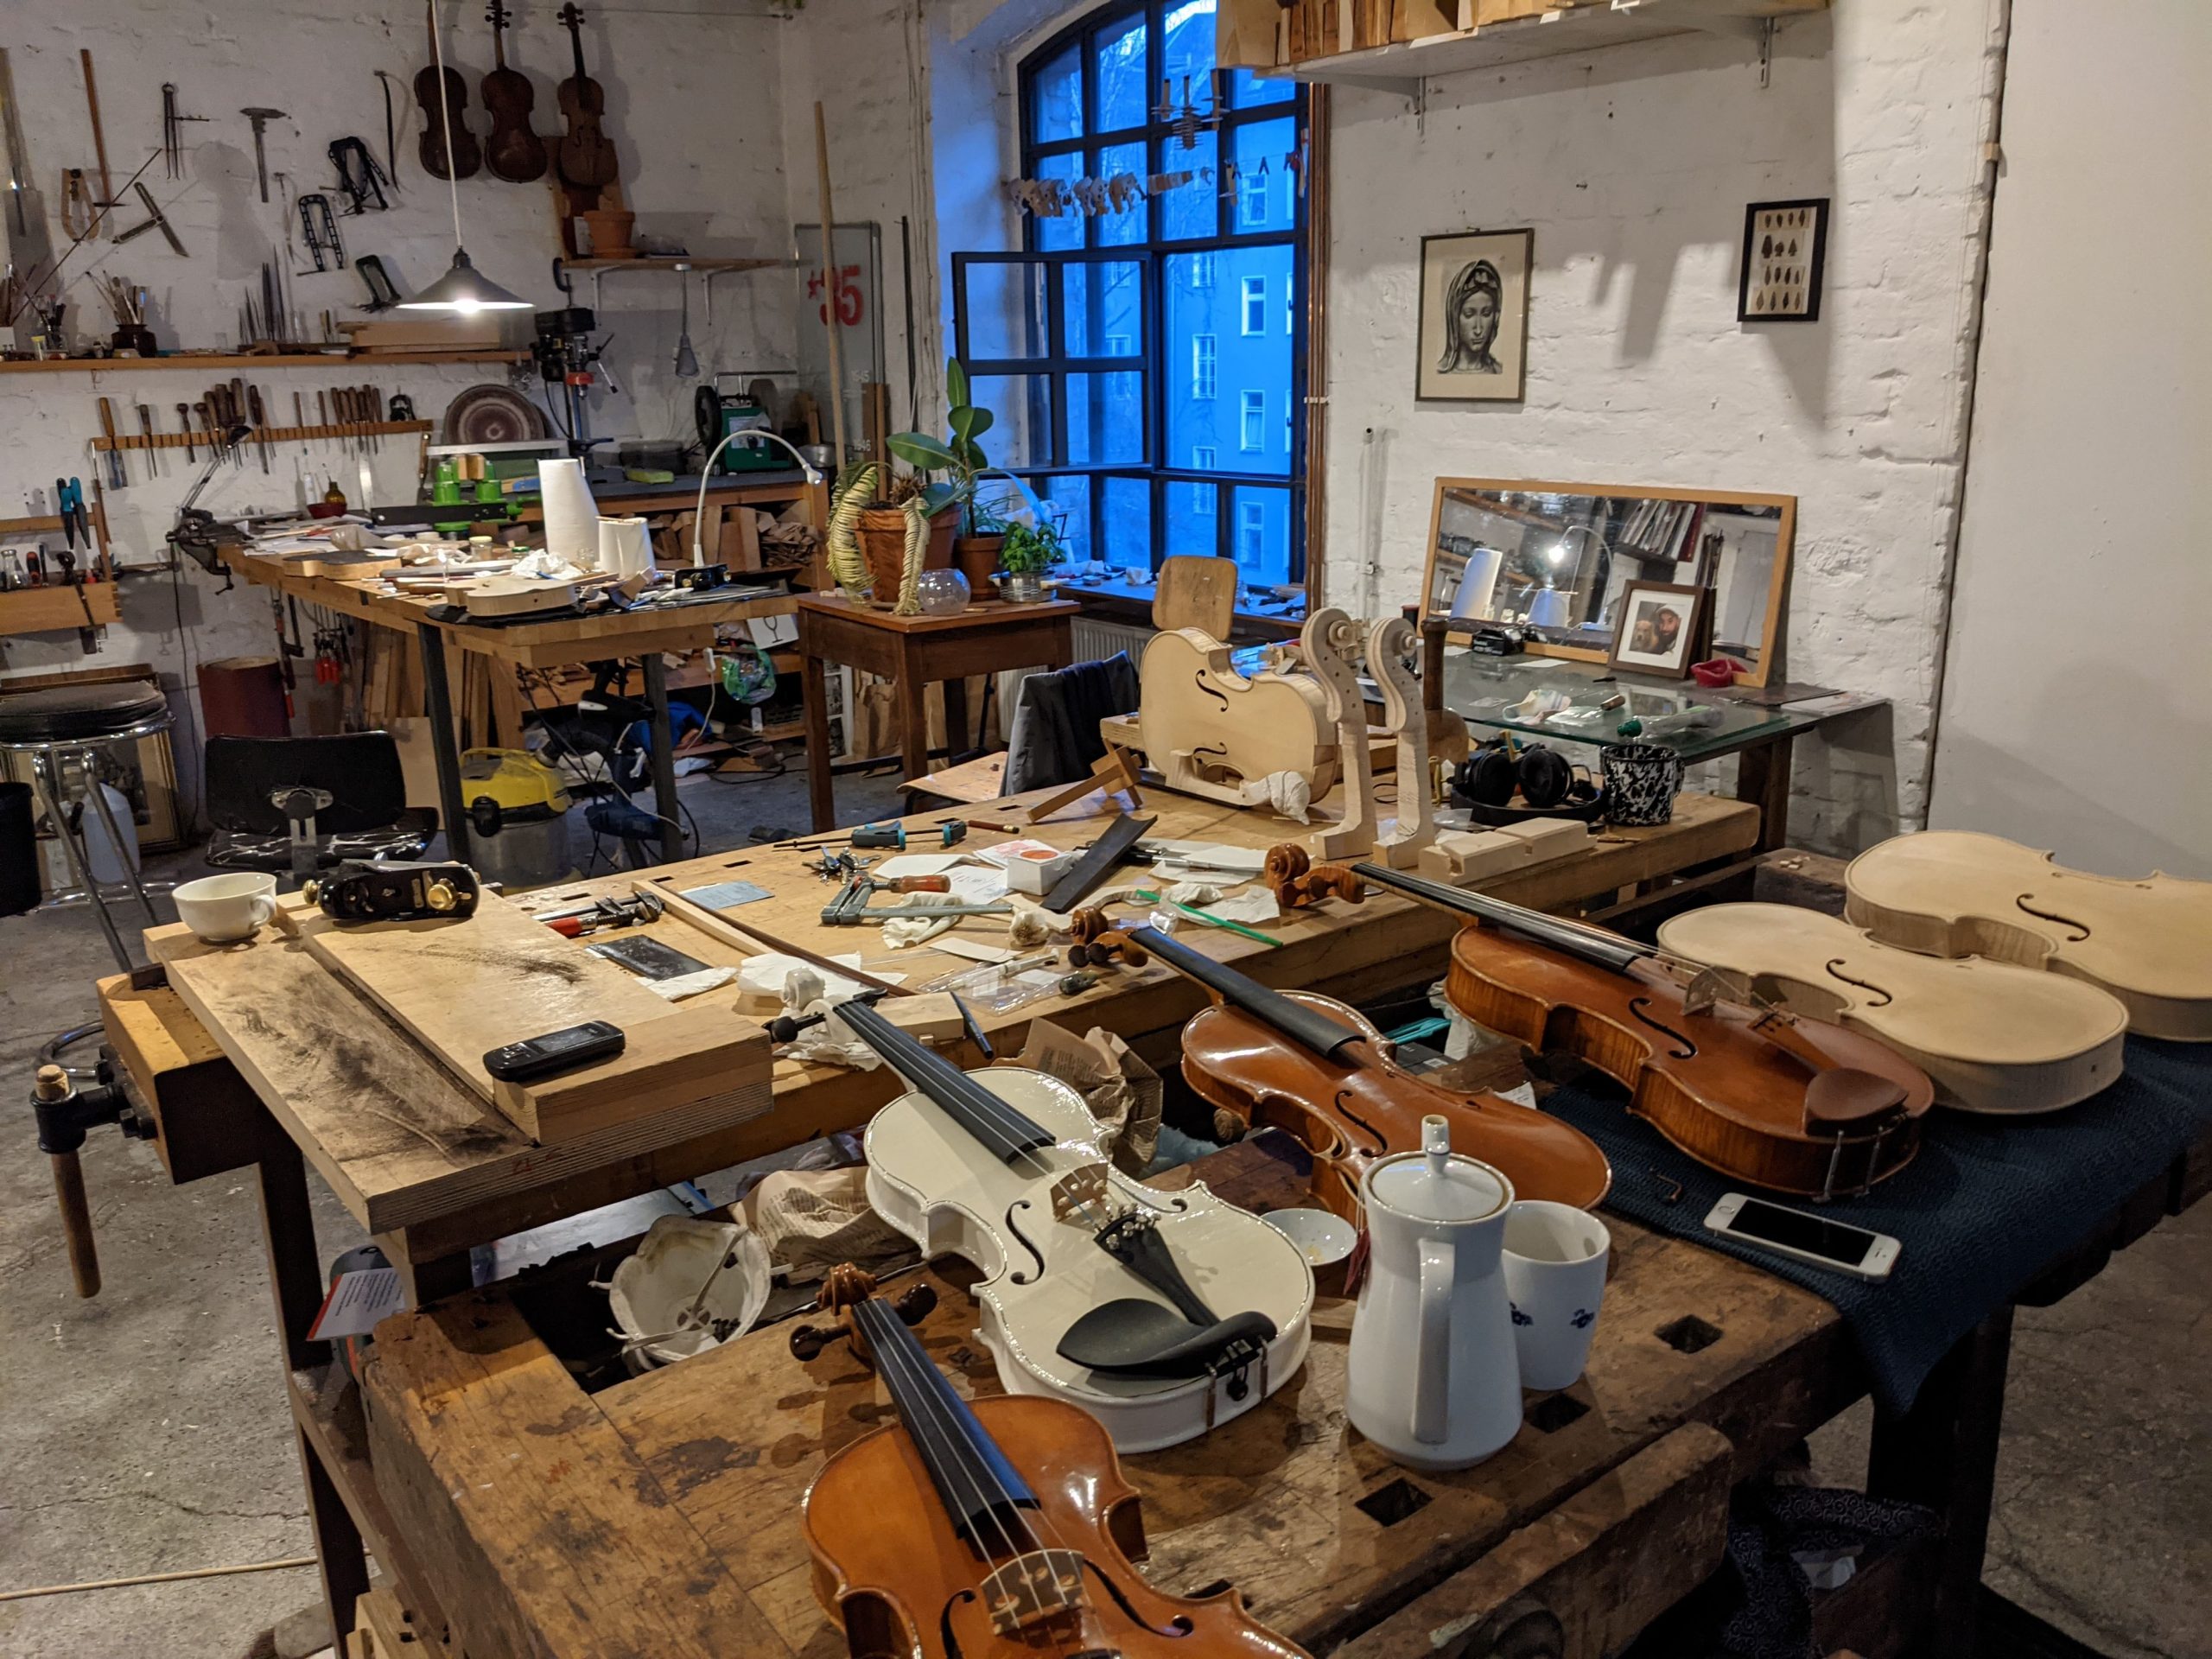
After the violin was completed, I met up with the luthier Matthias von Wallbrunn from Berlin to show him the work and get his feedback. The photo shoes his workshop, in which the printed violin lays next to wooden ones, some of which are in the process of being built.
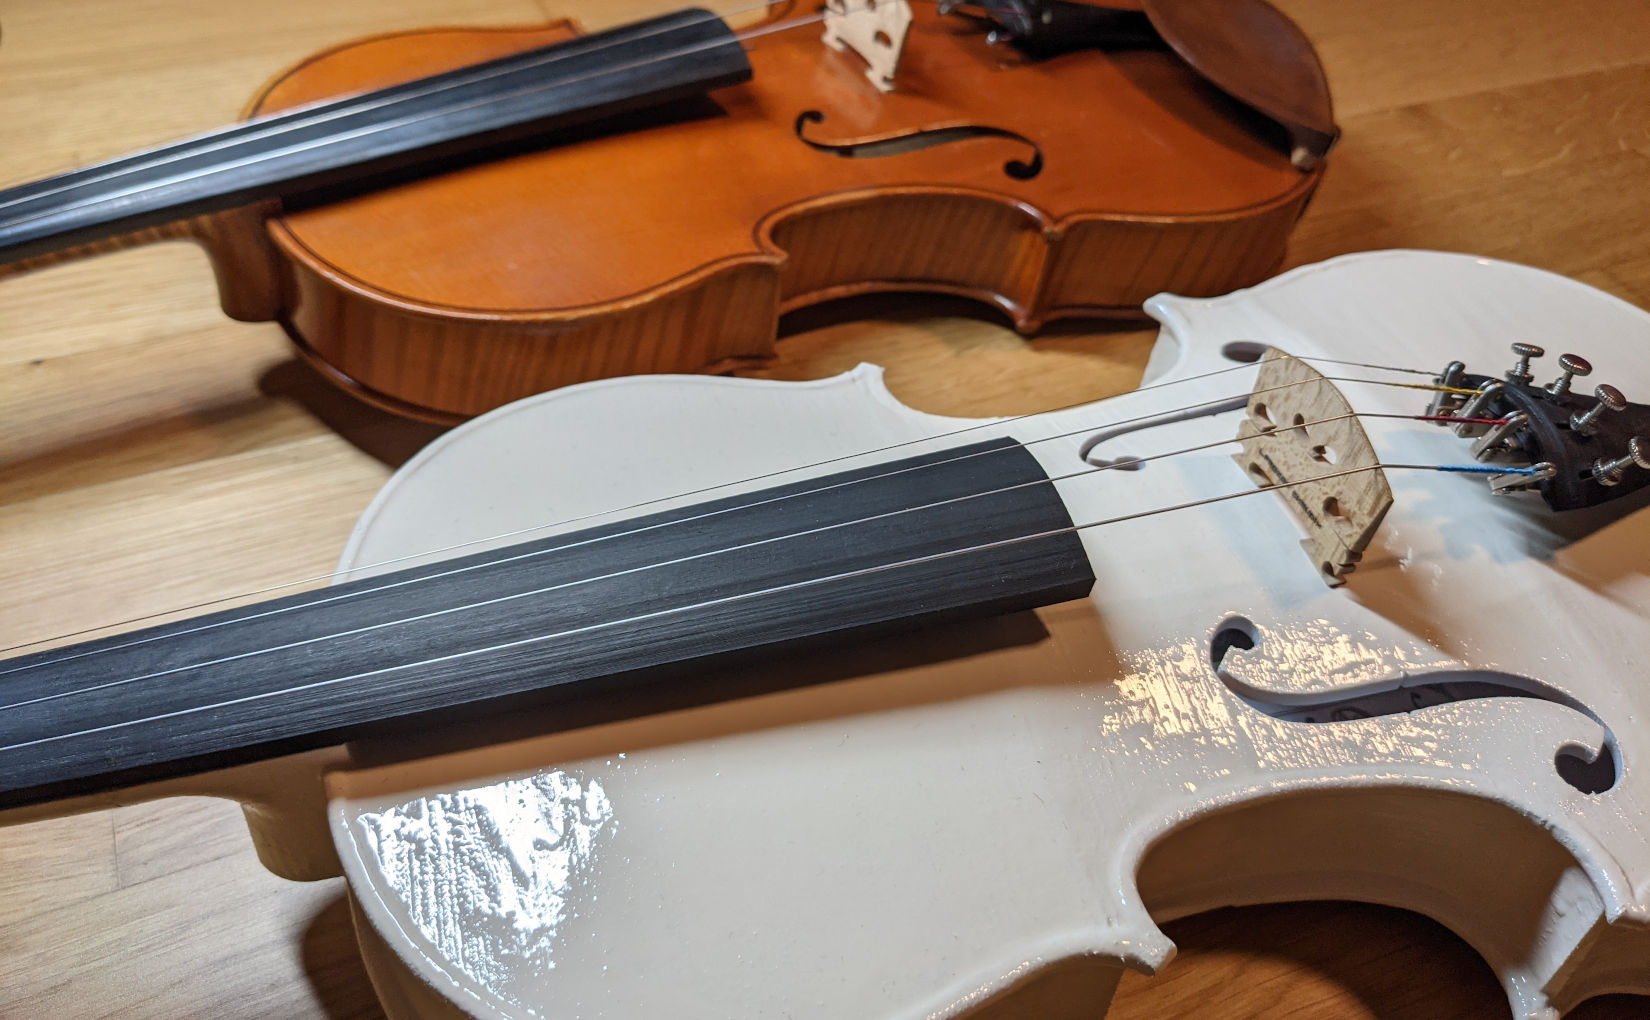
When receiving the violin, Matthias first noticed the heavy weight of the instrument. It is 682 g for the printed one, in comparison to 458 g of my wooden one. Interestingly, he spent several minutes inspecting just the violin’s body shape, before even thinking about bowing it. He told me it’s common for luthiers to pay a lot of attention to the details of the shape, rather than the violin’s sound. The sound is definitely important too, he said, but not what they’d check out first.
About the printed violin’s shape he noticed several things:
The pegs should be pushed further into the pegbox to stick out less. For that one could just make them thinner or the holes bigger and cut off the end that would stick out on the other side then.
The front plate (as well as the back plate) are too thick. I printed them to be around 4 mm thick, but in most places they should be more like 1.2 mm in thickness. At the center-top and center bottom of the body, even thinner. Around the sound post a bit stronger though.
The fingerboard is too thick as well.
The neck’s alignment is incorrect. It’s not terrible he said, but could be improved. The problem is the distance between strings and fingerboard, which is simply too large. Mischa also noticed that when playing the violin because it was harder to play in higher positions (where the finger goes up the fingerboard towards the bridge).
Related to the previous point, the nut is too high. This again leads to too much space between strings and fingerboard in the area closer to the scroll.
The neck, in particular the seam between neck and fingerboard should be smoother. He pointed out that this is a crucial part of violins because the player touches it all the time with their hand. He said for wooden violins it is one of the areas that luthiers pay particular attention too, that is, making it seamless, getting the thickness exactly right, but also carving out the nape nicely.
Then I tuned the violin and he tested the sound. He described it as warm and pleasant, however, not strong. It lacks depth, according to him. I was quite surprised when I myself heard the violin for the first time. I was totally ready for it to sound more like a crushed coke can, given the plastic is so different from wood. So the sound is good, but noticeably different from a wooden instrument.
Model Parts and Version 2
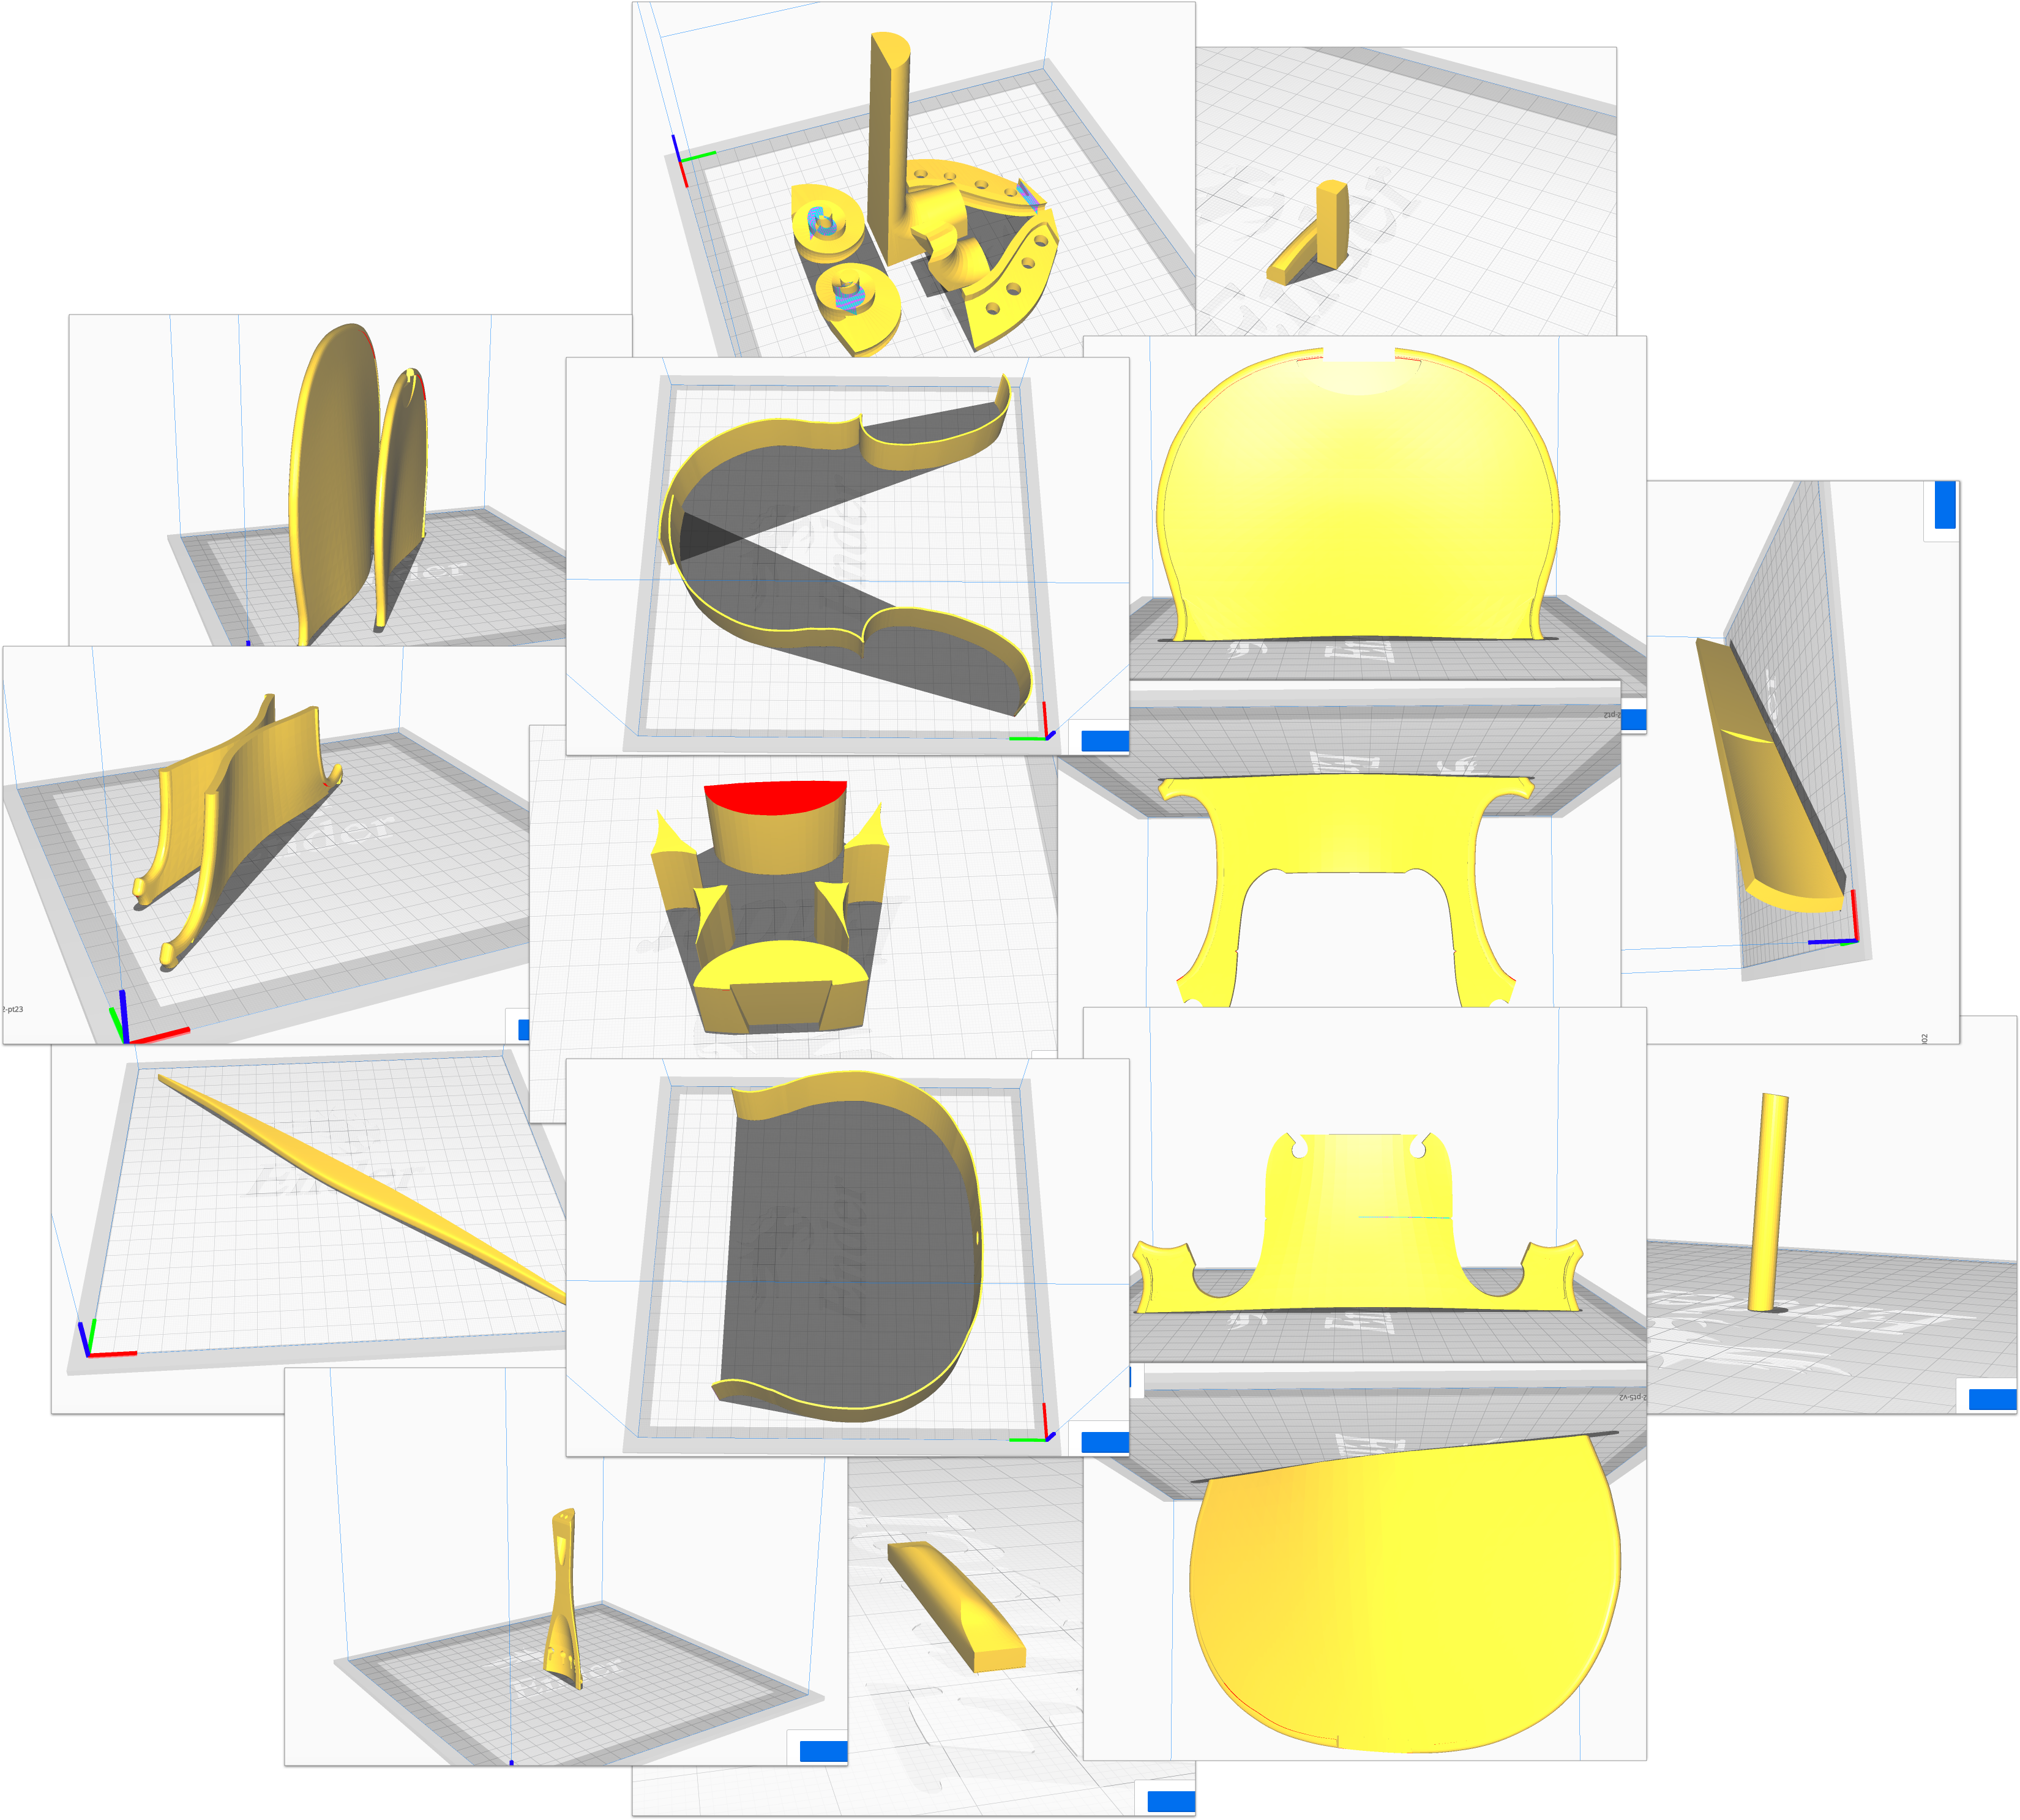
For all the fellow 3d-printing enthusiasts, STL files, Cura files, and GCODE can be found in this folder on Google Drive. Note that for several components I included different versions, in such cases I recommend going with the latest one. In general, the files are not ready to be just printed. There is a lot of tweaking necessary and when attempting to rebuild the violin one should be prepared for that.
I would do number of things differently in version 2. Below is an (incomplete) list of them:
Incorporate all the suggestions from the luthier (listed above).
Set the front and back plate’s infill too 100% This should work once they are much thinner and will probably improve the acoustics as well.
Print the blocks partly onto the backplate already, so they are attached the one of the plates and do not need to be fitted in.
Reinforce neck and pegbox. In the current version the violin cannot really be kept tuned because the neck is weak. One could either reinforce it with a carbon fiber bar or increase the infill. The pegbox should in any case be reinforced with more infill because it bends slightly when the violin is being tuned.
Make the ribs thinner and keep their thickness for the top-most and bottom-most 3 millimeters (so they can still be nicely glued onto front and back plate.
Attach the fingerboard to the neck first, subsequently attach the two to the body and make sure the alignment is good, i.e., the space between fingerboard and strings is as desired. Previously, I attached the neck first and the fingerboard later, which made the alignment harder.
Sand front and back plate more thoroughly to get rid of the seams at which the different printed pieces are glued together.
Add a small seam at the front and back plate’s outline into which the black line can then be drawn. In the current version I drew the outline freely by hand and it doesn’t look all too great.
Reduce the size of the overhang of front and back plate over the ribs.
Closing Remarks
Building the violin was fun! I learned a lot about the instrument in the process, for example, that the bridge is asymmetric. Crafting an instrument is also something emotional, I have to say. The moment I handed the violin to Mischa, for him to play, was surprising: When he started to bow the strings, to use my very instrument to produce beautiful sounds, I felt touched in a way unknown to me. It was magical.
Next up I plan to build (not a cello, but) a smaller violin and then another 4/4 violin with a reinforced neck and all other improvements. I am also planning to publish another article on this blog, which compares the sound of the wooden violin to the printed one quantitatively. For that I’ll compare the spectrograms of the two instruments.