Connecting PyCharm to a TensorFlow Docker Container
This guide walks you through setting up PyCharm Professional and Docker, with the goal of developing TensorFlow applications in PyCharm, while executing the code inside of an encapsulated container. After completing the following steps, you will be able to write Python code in PyCharm, and have the execution take place on a container, without any complication.
Prerequisites: Docker and PyCharm Professional (the Community Edition is not sufficient) must be installed.
Start Docker and download the latest TensorFlow Docker image with
docker pull tensorflow/tensorflow

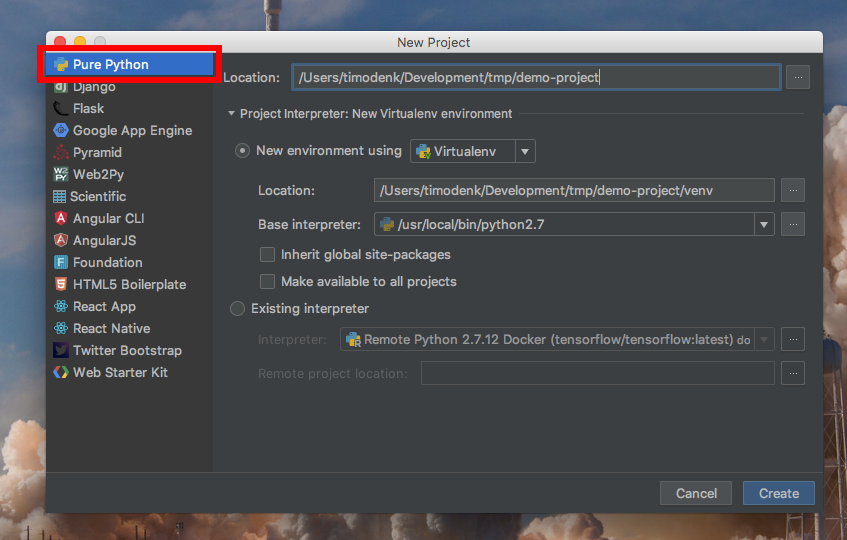
Open PyCharm and create a new “Pure Python” project in PyCharm. Leave the interpreter as-is, i.e. “New environment using Virtualenv”.
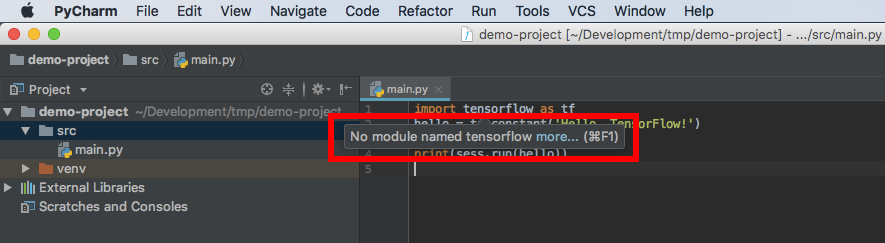
Add a “main.py” file with some TensorFlow test script, for instance the one from the TF install guide:
import tensorflow as tf
hello = tf.constant('Hello, TensorFlow!')
sess = tf.Session()
print(sess.run(hello))
PyCharm will complain, saying “No module named tensorflow” (unless TensorFlow is set up on the host machine).
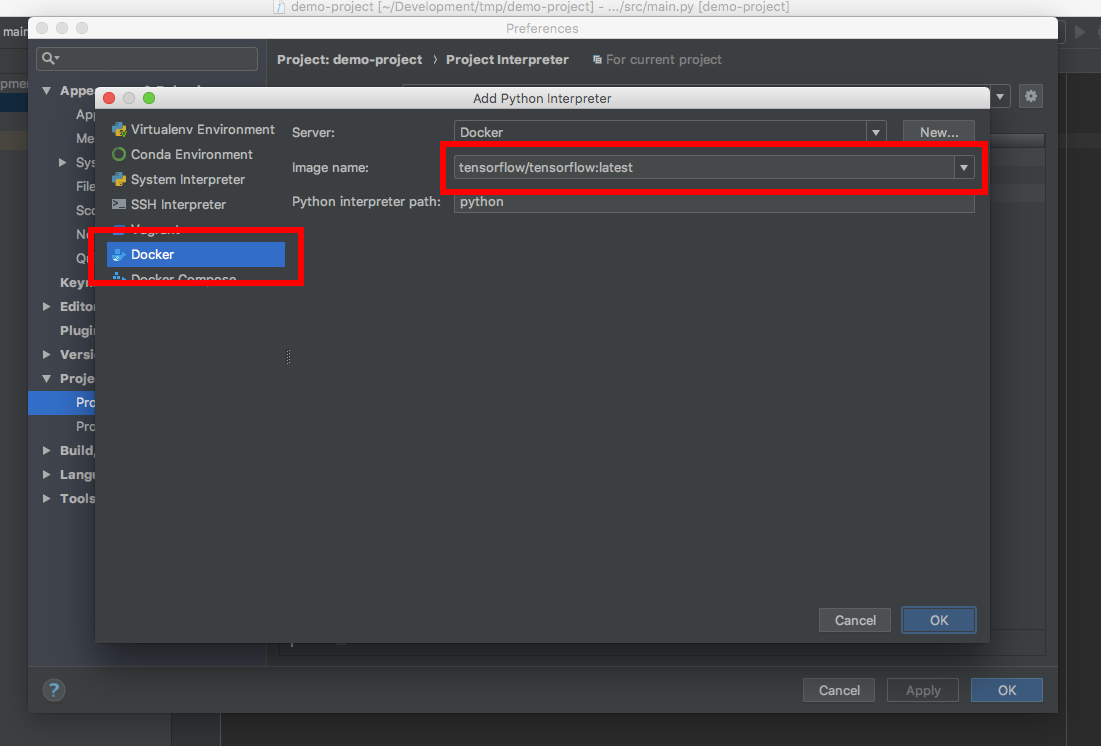
Open the PyCharm preferences and navigate to “Project:
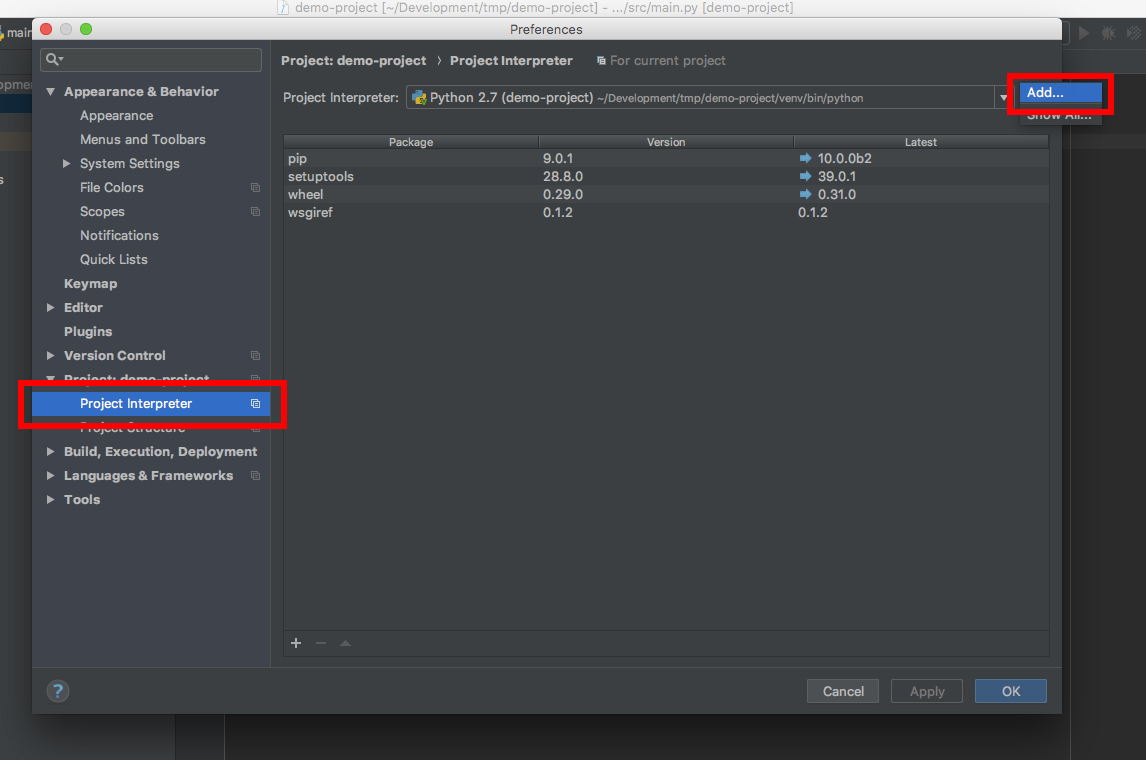
Select “Docker” and go with the image “tensorflow/tensorflow”.
The “No module named tensorflow” error should now be gone. PyCharm starts a Docker container in the background, whose python binary does the type-checking.
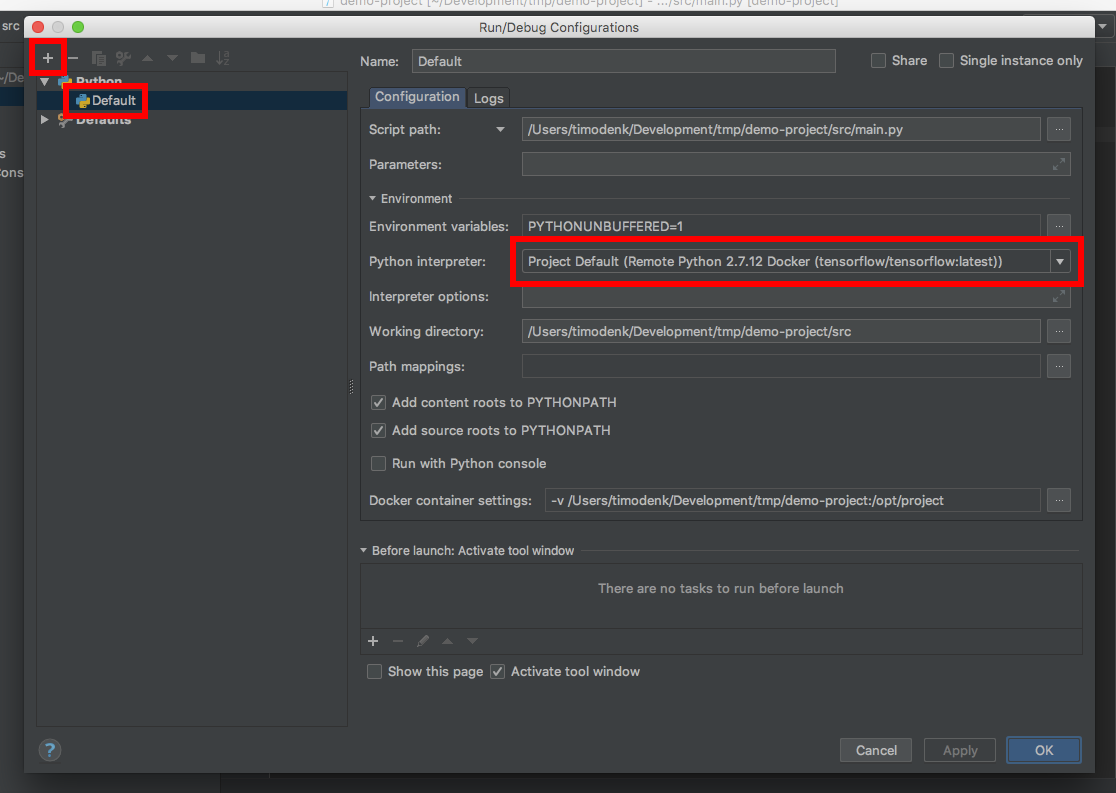
Add a new Python run/debug configuration, where the Python interpreter is set to be “Project Default (Remote Python 2.7.12 Docker (tensorflow/tensorflow:latest))”. Set the values “Script path” and “Working directory” as needed.
Hit the “Run” button and the console will output “Hello, TensorFlow!”. Debugging works as well.
